Let's make following Craggy Mountain with TATARA 7.0 and the Rough plug-in. 
To make Craggy Mountain, I prepared the following background image. 
Let's make the Craggy Mountain from the following steps.
1) Make the archetype of Craggy Mountain from TSUCHI.
2) Smooth Craggy Mountain.
3) Make Craggy Mountain the rough touch by Rough plug-in.
4) Make the control points other than the edge rough by Rough plug-in.
5) Maximize and save it and upload it to in-world.
You can check this tutorial by following video.
Let's make Craggy Mountain.
Boot TATARA and choose New on the File menu. 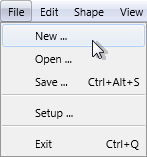
On the New dialog, choose 32x32 of PLANE and click the OK button. 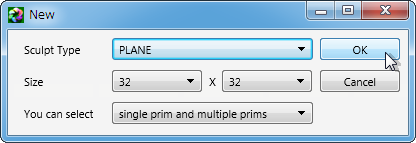
Let's turn the plate horizontally.
Let's check Shift Rotate Deg. before doing it.
Choose Setup on the File menu. 
Set Shift Rotate Deg. as 45 and click the OK button. 
As shown in the following figure, check that Edit Level at the lower left of the edit pane is Near, and that Disp only Surface is not checked. And click the YZ button at the lower left of the edit pane. 
As shown in the following figure. choose all the control points. 
As shown in the following figure, rotate the selected control points. If it drags pressing the SHIFT key, you can arrange them horizontally easily. 
Choose Load Background on the View menu and display the background image of the following figure. 
The edit pane is displayed as follows. 
Choose the control points in the red area of the following figure. 
As shown in the following figure, rearrange the selected control points. 
Click the XY button at the lower left of the edit pane. 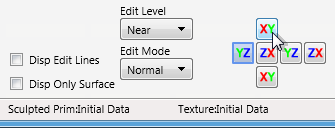
Choose the control points in the red area of the following figure. 
Click the YZ button at the lower left of the edit pane. 
As shown in the following figure, rearrange the selected control points. 
Click the XY button at the lower left of the edit pane. 
Choose the control points in the red area of the following figure. 
Click the YZ button at the lower left of the edit pane. 
As shown in the following figure, rearrange the selected control points. 
Click the XY button at the lower left of the edit pane. 
Choose the control points in the red area of the following figure.
Please don’t choose the control points on the magenta line. 
Click the YZ button at the lower left of the edit pane. 
As shown in the following figure, rearrange the selected control points. 
The preview is displayed as shown in the following figure. 
The archetype of the Craggy Mountain was made. Let's smooth it.
Let's check the setup, because Gauss Smooth is used to smooth.
Choose Setup on the File menu. 
Please check that Smooth Gauss Radius is 1.50. And click the OK Button. 
Right-click the edit pane and choose select – “Select All” on the popup menu. The shortcut of the keyboard is Ctrl+A. 
編集ペインを右クリックして,ポップアップメニューの を選択します。キーボードのショートカットはCtrl+Fです。
Right-click the edit pane and choose Smooth – “Gauss Smooth” on the popup menu. The shortcut of the keyboard is Ctrl+F. 
Please perform Gauss Smooth repeatedly until the edit pane gets as it is shown in the following figures. 
The preview is displayed as shown in the following figure. 
It got the form appropriate for the rock.
Let's make it more natural form by Rough plug-in.
The Rough Plug-in move the selected control points in the normal direction of the control point, and make the field rough.
Choose Rough plug-in on the Tool menu. 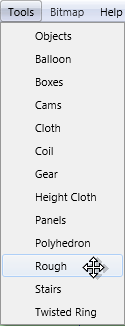
* Rough plug-in is the option.
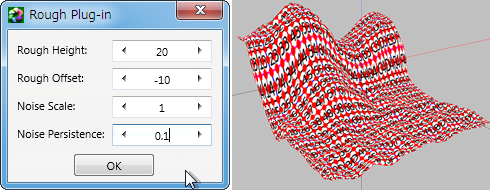
As shown in the following figure, set up the option, and click the OK button. 
Rough Height : You can set the maximum of the rough range.
Rough Offset : You can set the Offset of the rough.
Noise Scale : You can set the scale of noise.
Noise Persistence: You can set the noise persistence.
The preview is displayed as shown in the following figure. The direction displayed is automatically changed into ZX. 
The Noise option are as follows. 


Let's use Rough plug-in once again.
Click the XY button at the lower left of the edit pane. 
As shown in the following figure, choose the control points except the edge of the object of the red area. 
Arrangement of the knot has the flat surface kept up by this.
Choose Rough plug-in on the Tool menu. 
As shown in the following figure, set up the option, and click the OK button. 
The preview is displayed as shown in the following figure. 
Let's upload a sculpt-map file to the in-world.
Let's check Setup before saving.
Choose Setup on the File menu. 
Set TGA Save Size as 64x64 in the displayed dialog.
And let's check the following items.
-Copy Protection by transparent When the prim is modified, you can make it transparent to prevent the texture from being copied by screen capture.
-Auto Maximize The object saved when you save your sculpt map file is maximized automatically. 
If you check Auto Rename, overwrite of a sculpt-map file is prevented.
Let's save your sculpt map file in TGA File form.
Choose Save on the File menu. 
Choose TGA File of Save Dialog and save your file. 
Let's upload a sculpt-map file to the in-world.
When you upload a sculpt-map file, be sure to choose Upload Image.
It costs 10L$ to upload one Sculpt-Map file.
Choose Upload - Image (L$10) on the Build menu. 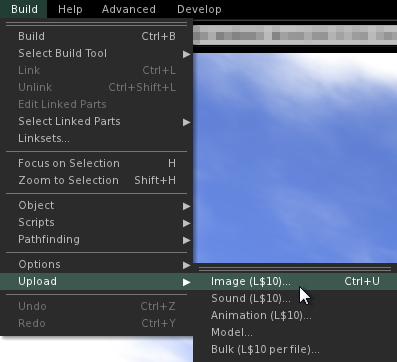
Specify “Preview image as” as Sculpted Prim. And check it by the preview. Check Use lossless compression. And click Upload Button. 
Build the objelct. And click the Object tab and set Building Block Type to Sculpted on Edit floater. 
Apply your uploaded sculpt map. 
And set Stitching type as Plane. 
Let's set it the texture.
Apply Library – Textures – Rock – ”Rock - Rippling” to it. 
Specify Horizontal Scale as 3.000 and specify Vertical Scale as 3.000. 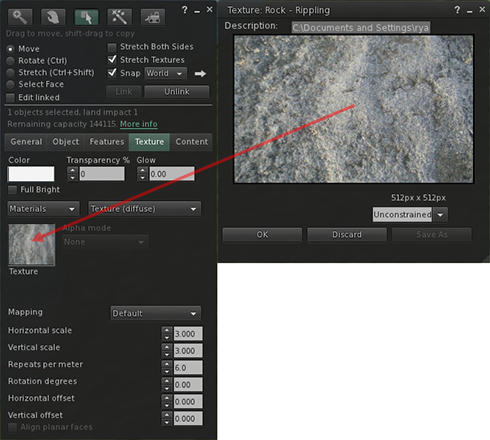
Stretch your object suitably.
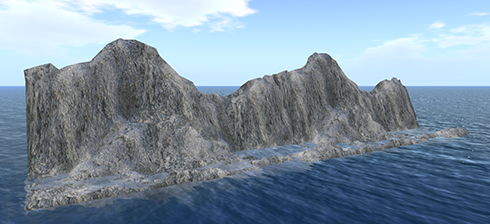
Craggy Mountain was completed. 
You can get the following mountains, if they are piled up slightly.
Original text: http://kanaenet.blogspot.jp/2013/12/t727-1.html
This article is automatically translated by the computer interpreter.
Please notify me of any mistakes in translation.


