Let's make the following rabbit balloon using TATARA 7.0. 
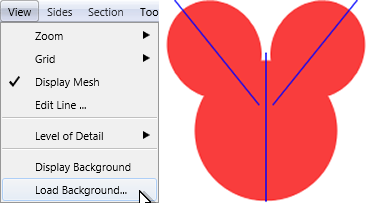
To make this, I made the following background images.
The background image is automatically resized by 256x256, and is displayed. 
If you want to make the rabbit balloon easily, I recommend to use Toos - Objects which is the new function of TATARA7.0.
Choose Objects on the Tools menu. 
Set Type as CYLINDER.
Choose 16x64 for Size.
Choose two as Detail.
And add three Sphere objects and click the OK button. 
Then, the three spheres are displayed as follows. 
Click the MAGE tab and change into MAGE mode. 
Select Load Background on the View menu and select the following background image. 
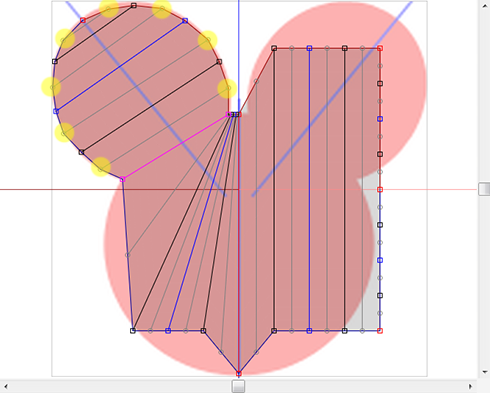
Rearrange the control points, as shown in the following figure.
You can treat each sphere as one group. So you can edit easily. 
Save the sculpt map file and upload it. Then you can get following rabbit balloon. 
However, I make the rabbit balloon which used all control points this time.
Let's make the rabbit balloon from the following steps.
1) Select 32x32 of Sphere by New on the File menu.
2) Make the form of the rabbit balloon by MAGE mode.
3) Save the grid texture and make the texture which changed the color of the ear.
4) Maximize, save and upload to the in-world.
You can check this tutorial by following video.
Let’s make a rabbit ballon.
Boot TATARA and select New on the File menu. 
Select 32x32 of Sphere on the New dialog, and click the OK button. 
Click the MAGE tab and change into MAGE mode. 
To edit easily, set Edit Level in the footing of the Edit pane as Middle. 
Select Load Background on the View menu and select the following background image. 
The edit pane is displayed as shown in the following figure. 
As shown in the following figure, select all the control points. 
The mouse cursor of the outside at the lower right of choice area drags mice from the area which becomes the rotational form, and rotates the selected control point the 90 degrees counterclockwise. 
Let's edit the left side of the rabbit balloon and copy to right side.
As shown in the following figure, rearrange the two control points which constitute the symmetry plane of the copy. 
Let's arrange the symmetry plane of the copy correctly.
As shown in the following figure, select the two rearranged control points. 
Right-click the edit pane and select Vertical Align on the popup menu. The shortcut of the keyboard is Ctrl+E. 
Let's edit the left ear of the rabbit balloon.
Rearrange the control point, as shown in the following figure. 
Select the control points of the red area of the following figure. 
Right-click the edit pane and select Equal Intervals on the popup menu. The shortcut of the keyboard is Ctrl+D. 
The edit pane is displayed as shown in the following figure. 
Let's edit the top of the left ear of the rabbit balloon.
As shown in the following figure, rearrange the control point at the left end of the object. 
Let's edit the right side of the left ear temporarily.
As shown in the following figures, rearrange the control point of red area. 
Right-click the edit pane and select Equal Intervals on the popup menu. The shortcut of the keyboard is Ctrl+D. 
Let's edit the left side of the left ear temporarily.
Rearrange the control point, as shown in the following figure. 
As shown in the following figure, rearrange the control points of red area. 
Right-click the edit pane and select Equal Intervals on the popup menu. The shortcut of the keyboard is Ctrl+D. 
As shown in the following figure, rearrange the six control points. 
As shown in the following figure, rearrange the round gray control points of yellow area. 
Select the control point of red area as the following figures.
Though many control points are found in the far right edge of the ear, select only the one control point of left side. 
Right-click the edit pane and select Equal Distance on the popup menu. The shortcut of the keyboard is Shift+Ctrl+D. 
As shown in the following figure, rearrange the gray and white control points of yellow area. 
Now, the left ear of the rabbit balloon was made.
Let's edit the left side of the face and copy to right side.
As shown in the following figure, rearrange the three control points. 
As shown in the following figure, rearrange the round gray control points of yellow area. 
As shown in the following figure, select the control points of red area. 
Right-click the edit pane and select Equal Distance on the popup menu. The shortcut of the keyboard is Shift+Ctrl+D. 
以下の図のように,赤いエリアの灰色の丸いコントロールポイントを再配置します。 
Left side of the face of the rabbit balloon was made.
The preview is displayed as shown in the following figures. The control point of the specular surface consists of 17, 27, 37, and .. And the symmetry plane consists of blue and the green axis line. 
Select Mirror 08-GG from 00-G7 on the Edit menu. 
Click the YZ button of the mirror dialog. 
The form of the rabbit balloon was made. 
Select Save on the Texture menu in the far left edge of the menu bar, and save the grid texture currently displayed on the preview. 
Please check the boundary of the ear and the face by the preview pane. 
Please make the following texture by your graphic tool. 
Select Load on the Texture menu and apply the created texture to the preview. 
The preview is displayed as shown in the following figure. 
Let's upload a sculpt-map file to the in-world.
Let's check Setup before saving.
Select Setup on the File menu. 
Set TGA Save Size as 64x64 in the displayed dialog.
And let's check the following items.
-Copy Protection by transparent When the prim is modified, you can make it transparent to prevent the texture from being copied by screen capture.
-Auto Maximize The object saved when you save your sculpt map file is maximized automatically. 
If you check Auto Rename, overwrite of a sculpt-map file is prevented.
Let's save your sculpt map file in TGA File form.
Select Save on the File menu. 
Select TGA File of Save Dialog and save your file. 
Let’s upload texture file. It costs 10L$ to upload one texture file.
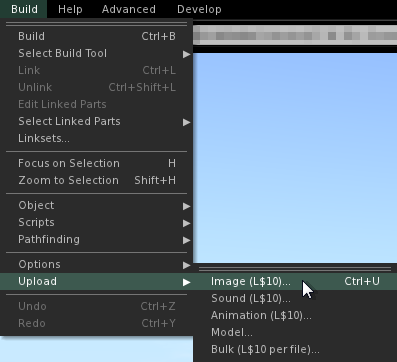
Select Upload - Image (L$10) on the Build menu. 
Select the texture file, and click Upload button after checking by preview. 
Let's upload a sculpt-map file to the in-world.
Select Upload - Image (L$10) on the Build menu. 
Specify “Preview image as” as Sculpted Prim. And check it by the preview. Check Use lossless compression. And click Upload Button. 
Build the objelct. And click the Object tab and set Building Block Type to Sculpted on Edit floater. 
Apply your uploaded sculpt map. 
Click the Texture tab. And apply the texture uploaded to the texture of the Texture tab. 
Stretch your object suitably. 
The rabbit ballon was completed. 
Original text: http://kanaenet.blogspot.jp/2013/09/t718-1.html
This article is automatically translated by the computer interpreter.
Please notify me of any mistakes in translation.


