Let's make the following old rail wood fence using TATARA 7.0. 
If you want to make the fence of the new tree, I recommend to use Toos - Objects which is the new function of TATARA7.0.
Choose Objects on the Tools menu. 
Set Type as CYLINDER.
Choose 16x64 for Size.
Choose two as Detail.
And add four Cylinder objects and click the OK button. 
Then, the four cylinders are displayed as follows. 
If you rearrange these in MAGE mode, you will be able to make the fence of the following new trees simply. 
However, it is the old wood rail fence that I would like to make this time. I prepared the following background image. 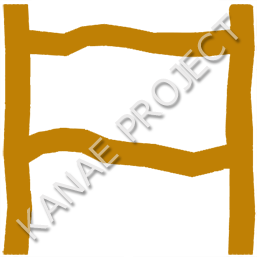
Let's make rail wood fence from the following steps.
1) Choose 16x64 of Sphere by New on the File menu.
2) Make the one pillar thin in ROKURO mode, and divide into four.
3) Make the four pillars still thinner in MAGE mode, and leave and rearrange the aperture.
4) Equalize disposition of the control point.
5) Fill the aperture between the pillars.
6) Rearrange the control points using the background image.
7) Maximize, save and upload it to the in-world.
You can check this tutorial by following video.
Let's make a old rail wood fence.
Boot TATARA and choose New on the File menu. 
Choose 16x64 of Sphere in the New dialog, and click the OK button. 
Click the ROKURO tab and change into ROKURO mode. 
To edit easily, set Grid on the View menu as 4. 
And set Edit Level in the footing of the Edit pane as Middle. 
When you move the square control point, the round control point will be rearranged automatically.
As shown in the following figure, choose the control point of red area. 
Right-click the edit pane and choose Equal Intervals on the popup menu. The shortcut of the keyboard is Ctrl+D. 
Let's divide into four the one pillar made thin.
The one pillar has nine red square control points.
You can make the one pillar every two control of the red square.
As shown in the following figure, rearrange the red square control point at the center of the pillar in the same height as the control point of the black square. 
As shown in the following figure, rearrange the red square control point at the center of the pillar in the same height as the control point of the black square. 
As shown in the following figure, rearrange the red square control point at the center of the pillar in the same height as the control point of the black square. 
As shown in the following figure, rearrange the black square control point at the center of the pillar in the same height as the control point of the blue square. 
As shown in the following figure, rearrange the black square control point at the center of the pillar in the same height as the control point of the blue square. 
As shown in the following figure, rearrange the black square control point at the center of the pillar in the same height as the control point of the blue square. 
You were able to divide it into the four pillars.
Let's assemble the four pillars temporarily by MAGE mode.
Click the MAGE tab and change into MAGE mode. 
Let's make the pillars thin.
As shown in the following figure, choose all the control points. 
As shown in the following figure, make the pillar thin. 
Let's rearrange the four pillars keeping apart them. It makes the one pillar easy to choose.
As shown in the following figure, choose the control points of red area. This is the left side post of the fence. 
As shown in the following figure, rearrange the selected control points. 
As shown in the following figure, lengthen the selected control points downward. 
As shown in the following figure, choose the control points of red area. This is the right side post of the fence. 
As shown in the following figure, rearrange the selected control points. 
As shown in the following figure, lengthen the selected control points downward. 
As shown in the following figure, choose the control points of red area. This is the upper rail of the fence. 
As shown in the following figure, rotate the selected control points the 90 degrees counterclockwise. 
As shown in the following figure, rearrange the selected control points. 
As shown in the following figure, lengthen the selected control points on the right. 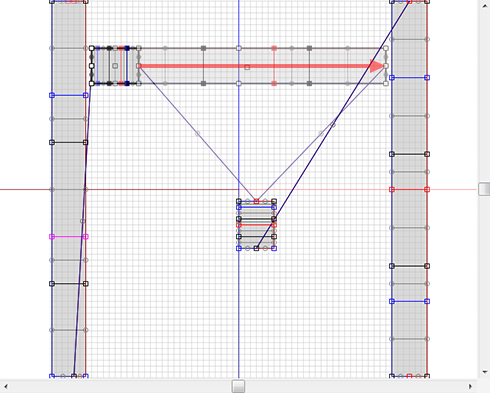
As shown in the following figure, choose the control points of red area. This is the lower rail of the fence. 
As shown in the following figure, rotate the selected control points the 90 degrees counterclockwise. 
As shown in the following figure, lengthen the selected control points on the left. 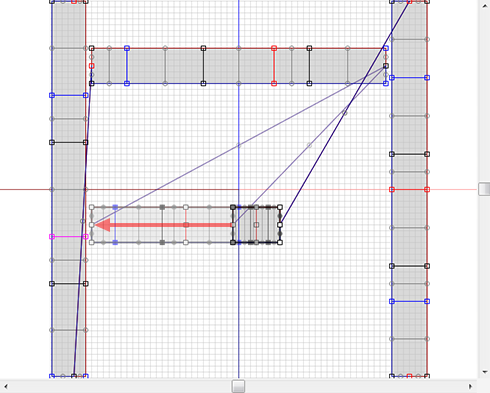
As shown in the following figure, lengthen the selected control points on the right. 
It was assembled temporarily. The preview is displayed as shown in the following figure. 
The texture is not assigned uniformly.
Let's make the space of the control points uniform so that the texture may be assigned uniformly.
Set Grid on the View menu as None. 
As shown in the following figure, choose the control points of red area. 
Right-click the edit pane and choose Equal Intervals on the popup menu. The shortcut of the keyboard is Ctrl+D. 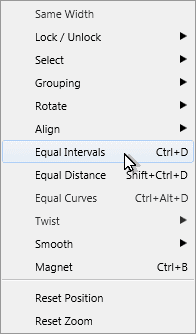
As shown in the following figure, choose the control points of red area. 
Right-click the edit pane and choose Equal Intervals on the popup menu. The shortcut of the keyboard is Ctrl+D. 
As shown in the following figure, choose the control points of red area. 
Right-click the edit pane and choose Equal Intervals on the popup menu. The shortcut of the keyboard is Ctrl+D. 
As shown in the following figure, choose the control points of red area. 
Right-click the edit pane and choose Equal Intervals on the popup menu. The shortcut of the keyboard is Ctrl+D. 
As shown in the following figure, choose the control points of red area. 
Right-click the edit pane and choose Equal Intervals on the popup menu. The shortcut of the keyboard is Ctrl+D. 
As shown in the following figure, choose the control points of red area. 
Right-click the edit pane and choose Equal Intervals on the popup menu. The shortcut of the keyboard is Ctrl+D. 
As shown in the following figure, choose the control points of red area. 
Right-click the edit pane and choose Equal Intervals on the popup menu. The shortcut of the keyboard is Ctrl+D. 
As shown in the following figure, choose the control points of red area. 
Right-click the edit pane and choose Equal Intervals on the popup menu. The shortcut of the keyboard is Ctrl+D. 
The edit pane is displayed as shown in the following figure. 
The preview pane is displayed as shown in the following figure. 
Let's fill the aperture on yellow area.
Choose the control points of the red area which is the upper rail as shown in the following figure. 
Lengthen the selected left side of the rail to the center of the left post as shown in the following figure. 
Lengthen the selected right side of the rail to the center of the right post as shown in the following figure. 
Choose the control points of the red area which is the lower rail as shown in the following figure. 
Lengthen the selected left side of the rail to the center of the left post as shown in the following figure. 
Lengthen the selected right side of the rail to the center of the right post as shown in the following figure. 
The edit pane is displayed as shown in the following figure. 
The form of the new rail wood fence was completed.
Let's make the rail fence old using the background image.
Choose Load Background of the View menu and choose the following background image. 
The edit pane is displayed as follows. 
And set Edit Level in the footing of the Edit pane as Near. 
As shown in the following figures, rearrange the control point along with the background image. 
The form of the old rail wood fence was completed.
Let's upload a sculpt-map file to the in-world.
Let's check Setup before saving.
Choose Setup on the File menu. 
Set TGA Save Size as 64x64 in the displayed dialog.
And let's check the following items.
-Copy Protection by transparent When the prim is modified, you can make it transparent to prevent the texture from being copied by screen capture.
-Auto Maximize The object saved when you save your sculpt map file is maximized automatically. 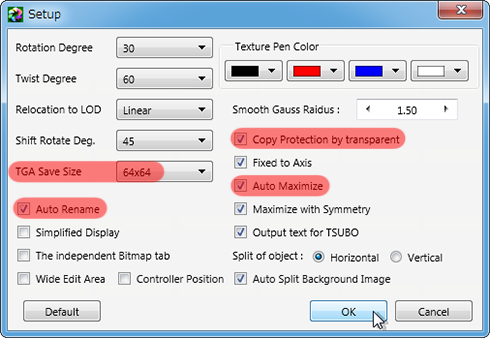
If you check Auto Rename, overwrite of a sculpt-map file is prevented.
Let's save your sculpt map file in TGA File form.
Choose Save on the File menu. 
Choose TGA File of Save Dialog and save your file. 
Let's upload a sculpt-map file to the in-world.
When you upload a sculpt-map file, be sure to choose Upload Image.
It costs 10L$ to upload one Sculpt-Map file.
Choose Upload - Image (L$10) on the Build menu. 
Specify “Preview image as” as Sculpted Prim. And check it by the preview. Check Use lossless compression. And click Upload Button. 
Build the objelct. And click the Object tab and set Building Block Type to Sculpted on Edit floater. 
Apply your uploaded sculpt map. 
Stretch your object suitably. 
The old rail wood fence was completed. 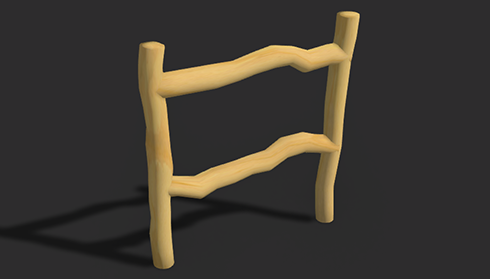
Original text: http://kanaenet.blogspot.jp/2013/09/t717-1.html
This article is automatically translated by the computer interpreter.
Please notify me of any mistakes in translation.


