Let's make the following spoon using TATARA 6.0.
To make this, I prepared the three following background images.
|
The side of the spoon |  |
|
The upper side of the spoon |
The right background image rotates the upper left background image.
Let's make the spoon from the following steps.
1) Choose Cylinder 64x16 by New on the File menu.
2) Make the side of the spoon in TOKOROTEN mode.
3) Only the half makes the upper surface of the spoon in TSUCHI mode.
4) Make the upper surface using Mirror.
5) Make the side of the spoon in TSUCHI mode.
6) Smooth the spoon by Smooth.
7) Edit the tip of the cup of the spoon in TSUCHI mode.
8) Close one side of the side in TSUCHI mode.
9) Close both of sides by Mirror.
10) Maximize, save and upload to the in-world.
You can check this tutorial by following video.
Let's make the spoon.
Boot TATARA and choose New on the File menu. 
In the New dialog, choose 64x16 of CYLINDER and click the OK button. 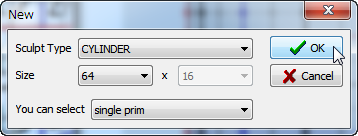
lick the TOKOROTEN tab and change edit mode into TOKOROTEN. 
Set Grid on the View menu as None. 
Set Edit Level in the lower-left of the edit pane as Middle. 
Choose Load Background on the View menu and display the background image of the following figure. 
Let's make the edge of the side of the spoon.
As shown in the following figure, arrange the five control points. 
Choose the two control points of the red area of the following figure. 
Right-click the edit pane and choose Vertical Align on the popup menu. The shortcut of the keyboard is Ctrl+E. 
Choose the control point of the red area of the following figure. 
Right-click the edit pane and choose Equal Intervals on the popup menu. The shortcut of the keyboard is Ctrl+D. 
As shown in the following figure, put the control point on the upper left control point. 
Choose the control point of red area, pressing the Shift key. 
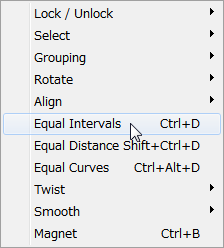
Choose the control points of the red area of the following figures. 
Set Edit Mode at the lower left of the edit pane as Worp. 
You can change Edit Mode, after choosing the control point. The edit pane is displayed as shown in the following figure. 
Rearrange the round gray control points in Worp mode so that the control point which constitutes above the cup is arranged like the yellow area of the following figures. 
Click the O button at the lower left of the edit pane, and decide edit. 
Let's edit the upper side of the spoon on TSUCHI mode.
Click the TSUCHI tab and change edit mode into TSUCHI. 
Click the YZ button at the lower left of the edit pane. 
To close the edge of the right and left of the spoon, choose the control points, as shown in the following figure. 
As shown in the following figure, rearrange the selected control points. 
Choose Load Background on the View menu and set the background image of the following figure. 
Select the control points of the red area of the following figure. 
As shown in the following figure, rearrange the selected control points in the height at the right end of the spoon. 
Select the control points of the red area of the following figure. 
As shown in the following figure, rearrange the selected control points. 
Set Edit Mode at the lower left of the edit pane as Worp. 
Make range selection of the control point of the following figure. 
Rearrange the gray circle and gray square the control points so that the control points are arranged in the yellow area of the following figure.

Click the O button at the lower left of the edit pane, and decide edit. 
Let's copy the upper half to the bottom half.
From the preview you see the source of the copy is 00-G3 and symmetry plane is constituted by red and the green line. 
Choose Mirror 04-GG from 00-G3 on the Edit menu. 
Click the XY button on the Mirror Dialog. 
As shown in the following figures, the bottom half was copied from the upper half. 
Let's make the cup of the spoon.
As shown in the following figure, choose the control points of yellow area. 
Because it is difficult to choose them, you can use the Bitmap tab.
Click the Bitmap tab and change edit mode into Bitmap. 
Choose the control point, as shown in the following figures.
Row: 00-40 and C0-60 and 90-G0
Line:20-60 
Click the TSUCHI tab and change edit mode into TSUCHI. 
Click the XY button at the lower left of the edit pane. 
Let's use the 3rd background image. The TSUCHI mode can set the background image for every display of the six buttons of the edit pane.
Choose Load Background on the View menu and set the background image of the following figure. 
Rearrange the gray circle and gray square control points so that the control point is arranged like the yellow area of the following figures. 
Click the O button at the lower left of the edit pane, and decide edit. 
Let's smooth the cup of the spoon.
Check the setup of Smooth before that. Choose Setup on the File menu. 
Set Smooth Radius as 1.5 and click the OK button. 
Set Edit Mode at the lower left of the edit pane as Normal. 
Right-click the edit pane and choose Vertical Moving Average on the popup menu. 
Please do Vertical Moving Average several times until the cup becomes smooth enough.
The preview pane is displayed as shown in the following figures. 
Let's edit the tip of the cup of the spoon.
As shown in the following figure, click the ZX button at the lower left of the edit pane. 
Set Edit Mode at the lower left of the edit pane as Worp. 
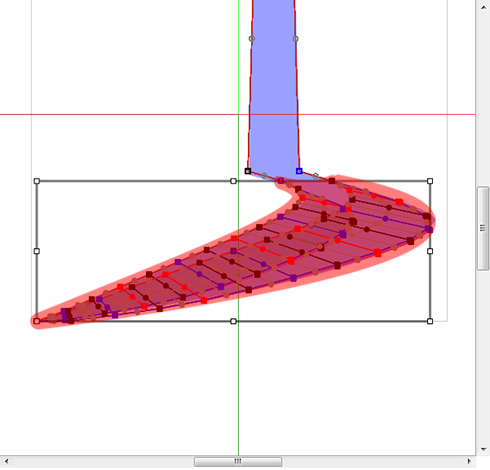
Choose the control point of the red area of the following figures. These are the tips of the cup. 
Like the yellow area of the following figures, rearrange the gray circle and gray square control points so that the center is arranged on the red axis. 
Click the O button at the lower left of the edit pane, and decide edit. 
Let's also edit the tip of the spoon seen from another direction.
Click the YZ button at the lower left of the edit pane. 
Set Edit Mode at the lower left of the edit pane as Normal. 
As shown in the following figure, choose and rearrange the control points in the upper half of the tip of the cup. 
From the preview, you see the side of the spoon not completed. 
Let's close the side of the spoon.
Choose Edit Line on the View menu. 
Click the ReverseNone button of the Edit Line dialog, choose 00 of the top of Rows and click the OK button. You can edit only the edge on the spoon. 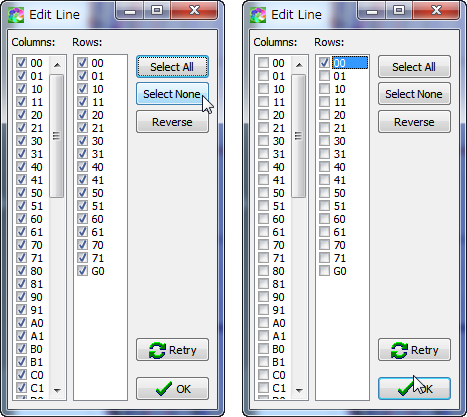
Click the XY button at the lower left of the edit pane. 
The edit pane is displayed as shown in the following figure. Choose the two control points for every yellow area. 
Right-click the edit pane and choose Magnet on the popup menu. The shortcut of the keyboard is Ctrl+B. 
The round gray control points are rearranged automatically.
The edit pane is displayed when you edit all the pairs as shown in the following figure. 
Let's edit the joint from another direction.
Click the ZX button at the lower left of the edit pane. 
The edit pane is displayed as shown in the following figures. Choose the two control points for every yellow area. 
Right-click the edit pane and choose Magnet on the popup menu. The shortcut of the keyboard is Ctrl+B. 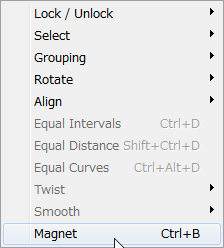
The round gray control point is rearranged automatically.
The edit pane is displayed when you edit all the pairs as shown in the following figure. 
Let's copy the upper half to the bottom half.
From the preview you see the source of the copy is 00-G3 and symmetry plane is constituted by red and the green line. 
Choose Mirror 04-GG from 00-G3 on the Edit menu. 
Click the XY button on the Mirror Dialog. 
The form of the spoon was made. 
Let's upload a sculpt-map file to the in-world.
Let's check Setup before saving.
Choose Setup on the File menu. 
Set TGA Save Size as 64x64 in the displayed dialog.
And let's check the following items.
-Copy Protection by transparent When the prim is modified, you can make it transparent to prevent the texture from being copied by screen capture.
-Auto Maximize The object saved when you save your sculpt map file is maximized automatically. 
If you check Auto Rename, overwrite of a sculpt-map file is prevented.
Let's save your sculpt map file in TGA File form.
Choose Save on the File menu. 
Choose TGA File of Save Dialog and save your file. 
Let's upload a sculpt-map file to the in-world.
When you upload a sculpt-map file, be sure to choose Upload Image.
It costs 10L$ to upload one Sculpt-Map file.
Choose Upload - Image (L$10) on the Build menu. 
Specify “Preview image as” as Sculpted Prim. And check it by the preview. Check Use lossless compression. And click Upload Button. 
Since Stitching type of the preview is displayed by Sphere, yellow area is displayed.
Let's apply the sculpt map.
Build the objelct. And click the Object tab and set Building Block Type to Sculpted on Edit floater. 
Apply your uploaded sculpt map. 
Set Stitching type as Cylinder. 
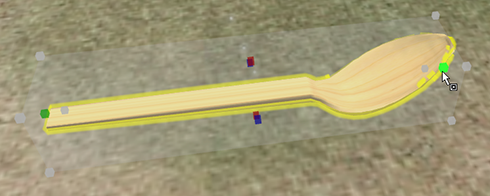
Click the texture tab and set shininess to the texture. 
The spoon was completed. 
Original text: http://kanaenet.blogspot.com/2011/11/t623-1.html
This article is automatically translated by the computer interpreter.
Please notify me of any mistakes in translation.


