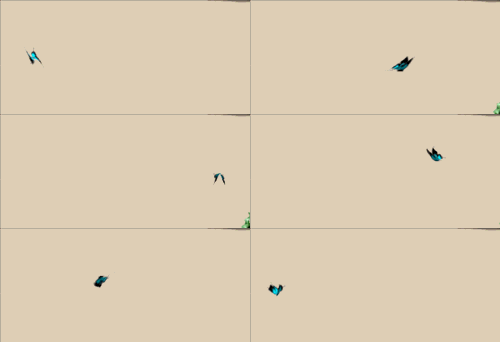
Let's make the following butterfly which fly from 1 Prim. 
Because it uses combining texture animation and local rotation, it is not a burden at SIM.
If you devise a script, you will be able to make a more complicated motion.
The track of a butterfly is made with the form of a sculpted prim.
The up-and-down motion of the feather of a butterfly is expressed by the upper and lower sides of a track.
As shown in the following figures, the texture on which the butterfly was drawn is moved. 
Select New-Torus-128x8 on the File menu.
Taurus is displayed on a preview pane.
Edit in ROKURO mode. And select five control points of an upper half.
Right-click an edit pane and select Equal Intervals. The keyboard shortcut is CTRL+D.
The edit pane is displayed as follows. 
Also edit a lower half by the same method.
If a control point is clicked pressing the Shift key, it will be selected in addition.
The track to which a butterfly flies was completed.
Let's make a motion of the feather of a butterfly.
Let's make the whole into the form which feather went up.
And move the control point of the square of the center of the edit range in the center of a track. Cursor changes from four arrows to one arrow at the center of rotation in the center of the selected range.
And raise the right end of the selection range. Cursor changes to rotation at the right end of the selection range.
Then, the selection range rotates centering on the control point of the moved square.
Edit left-hand side similarly. Then, an edit pane is as follows. 
If you think that rotational edit is difficult, you may arrange a control point like the upper image, without using rotational edit.
A preview pane is as follows.
Adjust the ratio of a track with a butterfly. Select all the control points of an edit pane, and reduce.
Adjust so that the lattice on the texture of a preview pane is visible to a square. And arrange at the right end of an edit pane.
Then, a preview pane is displayed as follows.
Let's make some tracks into the form where feather turned down. Let's select the section to edit.
Select Custom on the Sides menu.
Then, the following dialogs are displayed. 
First, click the “Select None” button and remove selection of all the sections.
Next, check all the “40” and “C0”(You have to check eight places. ). And click the Close button.
Confirm whether the specified section is selected by the preview pane.
You see red lines inserted by the orange lines. If the line black, gray, or blue is inserted by two orange lines, you have made a mistake in the selected section.
Click the ">" button in the lower left of an edit pane, and move to the section on which the button of a center is displayed as “40”. 
Select all the control points of the edit pane, and as shown in the following figure, drag the control point of the center of the upper neighborhood downward. 
An edit pane is as follows.
The preview pane is as follows. 
Let's make change of the smooth upper and lower sides of the edge of a track from Smooth on the Side menu.
The Smooth function on the Side menu smooths the section which is not selected on the basis of the selected section.
Because all downward sections are already selected, let's select the upward section which becomes a pair.
Select Custom on the Sides menu.
Click the “Select None” button and remove selection of all the sections.
Check all the “00” and “C0” and “C0”(You have to check eight places. ).
And click the Close button.
Confirm whether the specified section is selected by the preview pane.
The red section to which the preview pane was left behind is inserted in orange. 
All the sections that become a standard of movement of the upper and lower sides of feather were selected.
Select Smooth on the Sides menu. (Caution: It is not Smooth on the Edit menu)
The Smooth function on the Side menu smooths the section which is not selected on the basis of the selected section.
A preview pane is as follows.
Select Maximize of the Edit menu.
Then, a preview pane is as follows.
Select Save of the File menu and save a Sculpt-Map file. I recommend to add _sp to the file name of a Sculpt-Map file.
Let's make the texture of a butterfly.
Create the texture of a butterfly at 64x64 pixels, and rotate as follows.
Make a background transparent. 
I used the following free material. Thank you Andrzej Pobiedziński.
http://www.sxc.hu/photo/1119646
And as shown in the following figures, arrange up and down in two transparent images of 2048x128, and paste on a head. 
The texture was completed now.
Let's upload a sculpt-map file to the in-world.
When you upload a sculpt-map file, be sure to choose Upload Image on the File menu.
It costs 10L$ to upload one Sculpt-Map file.
And check by preview and check Use lossless compression. 
Yellow area is displayed because Sititching Type is previewed by Sphere.
Upload a texture. 
Apply a sculpt-map file to an object and set Sititching Type as Torus. 
It is as follows.
It is as follows if a texture is applied.
Click the new script button of a contents tab and edit a script as follows.
--
default
{
state_entry()
{
llSetTextureAnim(ANIM_ON | SMOOTH | LOOP, ALL_SIDES,1,1,1.0, 1,0.25);
llTargetOmega(<0.0,0.0,0.3>, PI, 1.0);
}
}
--
llSetTextureAnim is the command which carries out animation of the texture.
llTargetOmega is the command which rotates prim at local.
The butterfly was completed. 
Original text: http://kanaenet.blogspot.com/2009/02/blog-post_9734.html
This article is automatically translated by the computer interpreter.
Please notify me of any mistakes in translation.


