8/31/2010

Tutorial T513 Make a Soft Serve Ice Cream Part 2

Let's make the following soft serve ice cream using Coil plug-in of ROKURO Pro 2.0 and TATARA.

I have already made soft serve ice cream also by TATARA5.0. But I make it using Coil plug-in of ROKURO Pro 2.0 in this article.
Coil plug-in is the option of ROKURO Pro 2.0. <About Coil Plug-in>
Becasue I use the function improved by TATARA 5.0.158, please use TATARA 5.0.158 later.

Let's make soft serve ice cream from the following steps.
1) Make the model of rough soft serve ice cream with Coil plug-in of ROKURO Pro 2.0.
2) Save the sculpt map file made from ROKURO Pro 2.0.
3) Load the sculpt map file saved by ROKURO Pro on TATARA.
4) Process into the star shape the section of the part which is visible from outside on WAPPA mode.
5) Choose the upper end of soft serve ice cream on Bitmap mode.
6) Smooth the part selected on TUCHI mode.
7) Upload the sculpt map file to the in-world.

Boot ROKURO Pro 2.0.

The window of ROKURO Pro is displayed.

Coil plug-in is the option. If the plug-in file is put on the same folder as ROKURO Pro, the menu of plug-in will be added to the Tool menu.
Choose Coil on the Tool menu, and the setting dialog is displayed.

Set up as follows and click the OK button.
 
total coils : You can specify the number of turns of the coil.
32x32 : You can specify the aspect rate of the sculpted prim.
clockwize coil / anticlockwize coil : You can specify the direction which rolls the coil.
shape : You can specify the form of the section of the coil.
Rotated : You can rotate the form of the section of the coil.
Crystallized : You can arrange a control point only on a vertex in the section of the coil.
Width : You can specify the thickness of the both edges of a coil.
Z Position : You can specify the height of the both edges of a coil.
Diameter : You can specify the diameter of the both edges of a coil.

Since plug-in memorizes a setup of it, you can adjust these parameters easily.

The preview pane is displayed as follows.

Choose Save on the File menu and save a sculpt map file by a TGA file format.

Let's use the saved file by TATARA.

Boot TATARA. Please use TATARA 5.0.158 later.

Choose Load on the File menu and read the sculpt map file made by Coil Plug-in of ROKURO Pro 2.0.

The preview pane is displayed as follows. It is the same as ROKURO Pro.

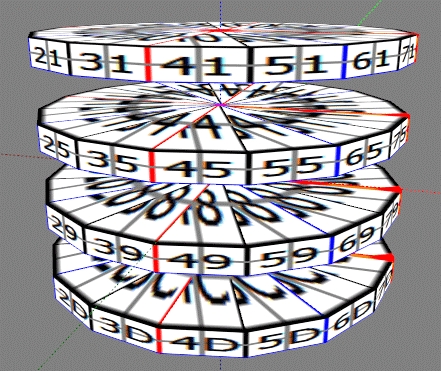
Click the WAPPA tab and change edit mode into WAPPA.

Let's change the section of a coil as follows.
Let's add a notch to the visible side of coil, and fill the crevice between the upper and lower sides of the coil.

As follows, WAPPA mode opts for direction of an edit display from four control points of yellow and an orange, and it rotates an edit display so that an orange control point may be arranged on the center of gravity of four control points.

Rearrange a control point as follows.

Rearrange control points as follows. Since one of the four control points for determining direction of an edit pane was moved, the display is rotating.

Rearrange a control point as follows.

Rearrange control points as follows. Since one of the four control points for determining direction of an edit pane was moved, the display is rotating.

Rearrange a control point as follows.

Rearrange the control point of yellow area as follows, and fill the crevice between the upper and lower sides of the coil.

The preview pane is displayed as follows.  

Let's smooth the top of soft serve ice cream.

Choose the Bitmap tab and change edit mode into Bitmap.

As follows, choose 00-G3.

Choose the TSUCHI tab and change edit mode into TSUCHI.

Right-click an edit pane and choose Gauss Smooth on the displayed pop up menu.

Please do this several times until the top becomes smooth enough.

The preview pane is displayed as follows.

Let's save the file and upload it to the in-world.

Let's check Setup before saving.
Choose Setup on the File menu. 
 

Set TGA Save Size as 64x64 in the displayed dialog.
And let's check the following items.
-Copy Protection by transparent  When a Prim is modified, you can make it transparent to prevent the texture from being copied by screen capture.
-Auto Maximize The object saved when you save a sculpt map file is maximized automatically.
 
If you check Auto Rename, overwrite of a sculpt-map file is prevented.

Let's save a sculpt-map file in TGA File format.

Select Save on the File menu.

Select TGA File of SaveDialog and save the file.

Let's upload the sculpt-map file to the in-world.

When you upload a sculpt-map file, be sure to choose Upload Image.
It costs 10L$ to upload one Sculpt-Map file.

Choose Upload - Image (L$10) on the Build menu.

Check it by preview. Check Use lossless compression.

Set Building Block Type of an object to Sculpted. And apply the sculpt map uploaded to it.

Set the texture of the Texture tab to Blank.
 

As follows, adjust the scale of the soft serve ice cream.
 

The soft serve ice cream was completed.

Original text: http://kanaenet.blogspot.com/2010/08/blog-post_30.html
This article is automatically translated by the computer interpreter.
Please notify me of any mistakes in translation.

8/27/2010

Tutorial T512 Make four Leaves

Let's make the four following leaves of 1 Prim using TATARA and SOMATO.

I have already made four leaves using TATARA4.0. But, this article corresponds to specification change of WAPPA of TATARA5.0. If you use TATARA 5.0 later, please use this article.

All of four leaves have the same form and texture. To make this, I prepared the background image of the following leaf.

* Though the edge of a leaf has a notch, please allow it to become smooth.

Let's make four leaves from the following steps.
1) Make the four disks on ROKURO mode.
2) Make the form of a leaf on TOKOROTEN mode.
3) Shift connection of four leaves in TSUCHI mode.
4) Adjust the form of a leaf on TSUCHI mode.
5) Once save it. (Please do not end TATARA.)
6) Make a texture from SOMATO using the background image and the sculpt map file which were saved.
7) Load into TATARA the texture created by SOMATO.
8) Make a leaf thin on TSUCHI mode.
9) Rearrange four leaves on TSUCHI mode.
10) 8)Upload them to in-world and modify it.

Let's make four leaves.

Boot TATARA and choose New on the File menu.

In the dialog displayed, choose 32x32 of SPHERE and click the OK button.

To edit easily, set Edit Level in the lower part of the Edit pane as Middle.
 
The round gray control points are rearranged automatically.

Set Grid on the View menu as eight.

Choose the control points shown as follows in red area.

Right-click the edit pane and choose Equal Intervals on the pop up menu displayed.

As follows, rearrange the control points.

As follows, rearrange the control points.

As follows, rearrange the control points.

As follows, rearrange the control points.

Choose all the displayed control points and expand horizontally as follows.

You made the four disks.

Let's make the form of the leaf from these disks.

Choose a TOKOROTEN tab and change edit mode into TOKOROTEN.

The edit by TOKOROTEN is reflected in other sections.

To consider it as the object of edit of only one section, click > button at the lower left of an edit pane twice, and choose the section 50.

Choose Load Background on the View menu and read the background image.
 

Set Grid on the View menu as None.

As follows, rearrange the control point of the root of a leaf.

As follows, rearrange the control point above a leaf.

As follows, choose the control point above the leaf.

Right-click an edit pane and choose Equal Distance. Please do this several times until the control points stop moving.

The control point of the following yellow area has been arranged at equal intervals.

You can rearrange these control points further. Since the control points of gray circle are rearranged later, please do not rearrange them now.

As follows, rearrange the control points below the leaf.

As follows, choose the control points of red area.

Right-click an edit pane and choose Equal Distance. Please do this several times until the control points stop moving.

The control point of the following yellow area has been arranged at equal intervals.

You can rearrange these control points further. Since the control points of gray circle are rearranged later, please do not rearrange them now.

Let's edit the form of leaves on TSUCHI mode.

TSUCHIタブを選択し,編集モードをTSUCHIに変更します。

As follows, click XY in the lower left of an edit pane. And uncheck Disp Edit Lines and Disp Only Surface.

Choose Load Background on the View menu and read the background image.

You get to know that direction of a leaf is different. This is because direction to a display is different on TOKOROTEN mode and TSUCHI mode.
As follows, choose all the control points.

As follows, drag the upper left of a selection control point and rotate a leaf 90 degrees.

Drag and move the control point selected as follows. And make them fit the background image.

Since a texture will not be beautifully drawn if a control point concentrates on the center of a leaf, let's move it so that it may not be conspicuous.

Choose the control point located as follows in red area not by click but by range selection. It is for also choosing the control points which overlap and aren’t visible.

Drag a control point like the following red arrow.

To rearrange the control points of the gray circle, set Edit Level at the lower left of the edit pane as Near.

To edit all four leaves at once, choose the control point of the gray circle by range selection as follows.

Rearrange the control points of the following yellow area.

Now, the form of the leaf was completed.

Let's save this sculpt map file.

Check a setup by Setup on the File menu before saving the file.

To make a texture from SOMATO using a background image, you have to save without maximizing the form edited by TATARA.
So, uncheck Auto Maximize and click the OK button

Choose Save on the File menu and save the sculpt map file.

Save by the TGA file format.

Please do not end TATARA.

Let's make a texture for the sculpt map file and background image which were saved using SOMATO.

Boot SOMATO, choose Load Sculpt/OBJ on the File menu, and read the sculpt map file saved by TATARA.

The preview pane of SOMATO is displayed as follows.

As follows, check a X-ray radio button and click 0 button.

Choose Load on the Source menu and read the background image.
 

Then, it is displayed as follows. You can check that it is the same display as the edit pane of TATARA.

If you want to adjust the position of a texture, choose Show Adjustment Pane on the Source menu.

And you can click the buttons of Zoom and Offset and can adjust the position of the texture.

Click the Bake button as follows and create the texture.

Choose Save on the Texture menu and save the made texture.

End SOMATO.

Let's read into TATARA the texture made from SOMATO, and make four leaves thin.

Choose Load on the Texture menu of TATARA and read the texture file made by SOMATO.

The preview pane is displayed as follows.

Check that edit mode is TSUCHI.

As follows, click the ZX button at the lower left of an edit pane.

As follows, choose the top leaf.

Right-click an edit pane, choose Horizontal Align on the pop up menu displayed, and make the selected leaf thin.

As follows, choose the 2nd leaf from the top.

Right-click an edit pane, choose Horizontal Align on the pop up menu displayed, and make the selected leaf thin.

As follows, choose the 3rd leaf from the top.

Right-click an edit pane, choose Horizontal Align on the pop up menu displayed, and make the selected leaf thin.

As follows, choose the bottom leaf.

Right-click an edit pane, choose Horizontal Align on the pop up menu displayed, and make the selected leaf thin.

Let's change four leaves into a suitable size.

As follows, click the XY button at the lower left of an edit pane.

Choose all the control points as follows.

Drag the control point at the upper left of range selection, and make leaves small.

Drag the leaf chosen as follows so that the root of a leaf might come in the center.

The background image is unnecessary.
Choose Disp Background on the View menu and undisplay a background image.

Let's rearrange four leaves.

As follows, click the ZX button at the lower left of an edit pane.

As follows, choose the 2nd leaf from the top.

As follows, click the XY button at the lower left of an edit pane.

Drag the central control point of the rotation which exists in the center of the selection range to the center.

As follows, drag the neighborhood of the control point at the upper right of the selection range, and rotate the selected leaf.

As follows, click the ZX button at the lower left of an edit pane.

以下のように,上から3番目の葉を選択します。

As follows, click the XY button at the lower left of an edit pane.

Drag the central control point of the rotation which exists in the center of the selection range to the center.

As follows, drag the neighborhood of the control point at the upper right of the selection range, and rotate the selected leaf.

As follows, click the ZX button at the lower left of an edit pane.

以下のように,一番下の葉を選択します。

As follows, click the XY button at the lower left of an edit pane.

Drag the central control point of the rotation which exists in the center of the selection range to the center.

As follows, drag the neighborhood of the control point at the lower right of the selection range, and rotate the selected leaf.

The preview pane is displayed as follows.

To check a texture, choose Disp Mesh on the View menu.

The preview pane is displayed as follows.

Let's save this sculpt map file and texture file and upload them to an in world.

Let's check Setup before saving it.
Choose Setup on the File menu.

Set TGA Save Size as 64x64 in the displayed dialog.
And let's check the following items.
-Copy Protection by transparent  When a Prim is modified, you can make it transparent to prevent the texture from being copied by screen capture.
-Auto Maximize The object saved when you save a sculpt map file is maximized automatically.

If you check Auto Rename, overwrite of a sculpt-map file is prevented.

Let's save a sculpt-map file in TGA File format.
Select Save on the File menu.

Select TGA File of SaveDialog and save the file.

Let's upload the sculpt-map file to the in-world.

When you upload a sculpt-map file, be sure to choose Upload Image.
It costs 10L$ to upload one Sculpt-Map file.

Choose Upload - Image (L$10) on the Build menu.

Check it by preview. Check Use lossless compression.

Similarly, also upload the texture of the leaves.

Set Building Block Type of an object to Sculpted.

And apply the sculpt map uploaded to it.

Apply the texture uploaded to the texture of the Texture tab.

Adjust the scale of sculpted prim.

Four leaves were completed. 

Original text: http://kanaenet.blogspot.com/2009/04/4_6319.html
This article is automatically translated by the computer interpreter.
Please notify me of any mistakes in translation.