Let's make the roof of the following roof of the Tiki house. 
To make this, I prepared the two following background images.

The side view of the roof

The front view of the roof
TATARA resizes the read background image automatically.
So, if you make a background image, please remove the space.
Let's make the roof of the Tiki house from the following steps.
1) Choose 32x32 of CYLINDER by New of the File Menu.
2) Make the prototype of the roof on TOKOROTEN mode.
3) Rotate the roof in TSUCHI mode.
4) Insert in the edge of the Horizontal of the roof.
5) Change the edit mode into Warp and make the form of the roof into that of the Tiki house.
6) Change the direction and arrange the edge of the Horizontal of the roof.
7) Choose Save of the File Menu and save the sculpt map file.
8) Upload to the in-world.
You can check this tutorial by following video.
Let's make the roof of the Tiki house.
Choose New on the File Menu. 
On the New dialog, choose 32x32 of CYLINDER and click the OK button. 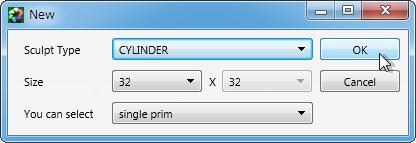
To edit easily, set Edit Level in the lower left of the edit pane as Near. 
Click the TOKOROTEN tab and change to TOKOROTEN mode. 
Choose Load Background on the View menu and select the following background image. 
Let's make the side of the roof on TOKOROTEN mode.
The background image is displayed, and the Edit pane is displayed as shown in the following figure. 
As shown in the following figure, choose the two control points. 
右側を再配置し,左側はミラー機能で再配置します。あなたは,その鏡面になる2つのコントロールポイントを正確に配置する必要があります。
As shown in the following figure, choose the two control points. 
Right-click the Edit pane and choose Vertical Align on the popup menu.
The shortcut of the keyboard is Ctrl+E. 
As shown in the following figure, rearrange the three control points. 
Choose the control points shown in the red area of the following figure. 
Right-click the Edit pane and choose Equal Intervals on the popup menu.
The shortcut of the keyboard is Ctrl+D. 
Choose the control point sshown in the red area of the following figure. 
Right-click the Edit pane and choose Equal Intervals on the popup menu.
The shortcut of the keyboard is Ctrl+D. 
The Edit pane is displayed as shown in the following figure. 
The preview pane is displayed as follows. You see the area which you edited is 00-70. 
Choose Mirror 80-GG from 00-7G on the Edit Menu. 
Click the ZX button on the displayed Dialog. 
The Edit pane is displayed as shown in the following figure. 
The prototype of the roof was made.
Let's rotate the all control pointes on TUCHI mode.
Choose the TSUCHI tab and change the edit mode into TSUCHI. 
Uncheck Disp Edit Lines and Disp Only Surface. 
Choose all, as shown in the following figures, and make it move in the Center of the Edit pane. 
Let's rotate the all control point.
Let's check the Angle rotated by Setup before that.
Choose Setup on the File Menu. 
Set Shift Rotate Deg. on the Setup Dialog as 45. 
Check that the cursor is rotated on the Outside of the corner is-between select control, and begin the drag. Press the shift key after it. The Rotate Right is made to rotate the object the 90 degrees. 
The Edit pane is displayed as shown in the following figure. 
As shown in the following figures, move it to the bottom of the Edit area.
Please arrange the horizontal position in the Center. 
Choose Load Background on the View Menu and set the background image of the front view of the roof. 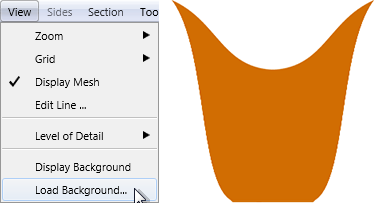
Let's insert in the edge of the Horizontal of the roof. This part is used for the closing for in the edge of the Horizontal of the roof.
Choose the control point of the red area of the following figure. 
Rearrange the control points chosen as shown in the following figure. 
Let's make it into the roof of the Tiki house.
Choose the control points of the red area of the following figure. 
Change Edit Mode at the lower left of the Edit pane into Warp. 
The Edit pane is displayed as shown in the following figure. 
The gray square and the circle control points of range selection are rearranged, and the roof is made.
Rearrange them, as shown in the following figure. 
Click the O button at the lower left of the Edit pane. 
You find that there is the gap shown in the edge of the Horizontal of the roof in the yellow area at the preview pane as shown in the following figure. 
Let's fill this gap.
Change Edit Mode at the lower left of the Edit pane into Normal. 
Choose Edit Line… on the View Menu. 
Click the Select None button of the Edit Line Dialog, check 00 of the Rows:list box and click the OK button. 
Click the YZ button of the bottom of the Edit pane. 
Choose the two control points of the red area of the following figure. 
Right-click the Edit pane and choose Magnet on the popup menu.
The shortcut of the keyboard is Ctrl+B. 
Choose the two control points of the red area of the following figure. 
Right-click the Edit pane and choose Magnet on the popup menu.
The shortcut of the keyboard is Ctrl+B. 
Choose the two control points of the red area of the following figure. 
Right-click the Edit pane and choose Magnet on the popup menu.
The shortcut of the keyboard is Ctrl+B. 
Choose the two control points of the red area of the following figure. 
Right-click the Edit pane and choose Magnet on the popup menu.
The shortcut of the keyboard is Ctrl+B. 
Choose the two control points of the red area of the following figure. 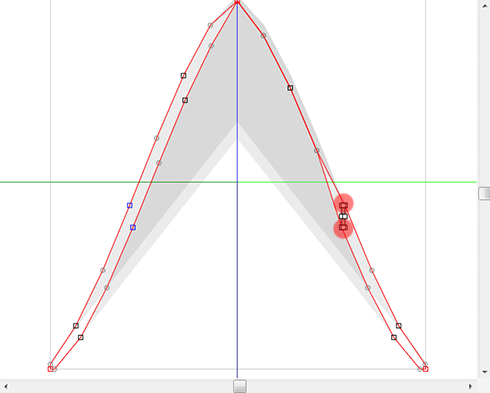
Right-click the Edit pane and choose Magnet on the popup menu.
The shortcut of the keyboard is Ctrl+B. 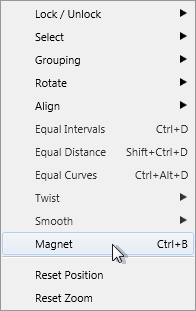
Choose the two control points of the red area of the following figure. 
Right-click the Edit pane and choose Magnet on the popup menu.
The shortcut of the keyboard is Ctrl+B. 
Choose the two control points of the red area of the following figure. 
Right-click the Edit pane and choose Magnet on the popup menu.
The shortcut of the keyboard is Ctrl+B. 
Choose the three control points of the red area of the following figure. 
Right-click the Edit pane and choose Magnet on the popup menu.
The shortcut of the keyboard is Ctrl+B. 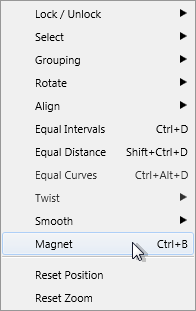
The edit pane is displayed as shown in the following figure. 
The preview is displayed as shown in the following figure. 
Choose Mirror 80-GG from 00-7G on the Edit Menu. 
Click the ZX button on the Mirror Dialog. 
The preview is displayed as shown in the following figure. The gap is found in the still yellow area. 
Click the ZX button of the bottom of the Edit pane. 
Choose the control point of the red area of the following figures by range specification. 
Right-click the Edit pane and choose Magnet on the popup menu.
The shortcut of the keyboard is Ctrl+B. 
Choose the control point of the red area of the following figures by range specification. 
Right-click the Edit pane and choose Magnet on the popup menu.
The shortcut of the keyboard is Ctrl+B. 
Choose the control point of the red area of the following figures by range specification. 
Right-click the Edit pane and choose Magnet on the popup menu.
The shortcut of the keyboard is Ctrl+B. 
Choose the control point of the red area of the following figures by range specification. 
Right-click the Edit pane and choose Magnet on the popup menu.
The shortcut of the keyboard is Ctrl+B. 
Choose the control point of the red area of the following figures by range specification. 
Right-click the Edit pane and choose Magnet on the popup menu.
The shortcut of the keyboard is Ctrl+B. 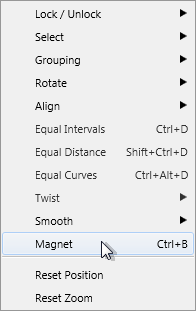
Choose the control point of the red area of the following figures by range specification. 
Right-click the Edit pane and choose Magnet on the popup menu.
The shortcut of the keyboard is Ctrl+B. 
Choose the control point of the red area of the following figures by range specification. 
Right-click the Edit pane and choose Magnet on the popup menu.
The shortcut of the keyboard is Ctrl+B. 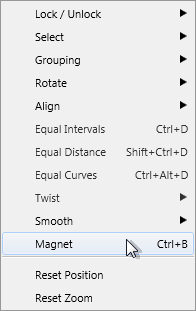
Choose the control point of the red area of the following figures by range specification. 
Right-click the Edit pane and choose Magnet on the popup menu.
The shortcut of the keyboard is Ctrl+B. 
The edge of the roof was filled. 
Let's use mirror the right roof to the left roof.
Select the Mirror 08-GG from 00-G7 on the Edit Menu. 
Click the YZ button on the Mirror Dialog. 
The preview is displayed as shown in the following figure. 
Let's upload a sculpt-map file to the in-world.
Let's check Setup before saving.
Choose Setup on the File menu. 
Set TGA Save Size as 64x64 in the displayed dialog.
And let's check the following items.
-Copy Protection by transparent When the prim is modified, you can make it transparent to prevent the texture from being copied by screen capture.
-Auto Maximize The object saved when you save your sculpt map file is maximized automatically. 
If you check Auto Rename, overwrite of a sculpt-map file is prevented.
Let's save your sculpt map file in TGA File form.
Choose Save on the File menu. 
Choose TGA File of SaveDialog and save your file. 
Let's upload a sculpt-map file to the in-world.
When you upload a sculpt-map file, be sure to choose Upload Image.
It costs 10L$ to upload one Sculpt-Map file.
Choose Upload - Image (L$10) on the Build menu. 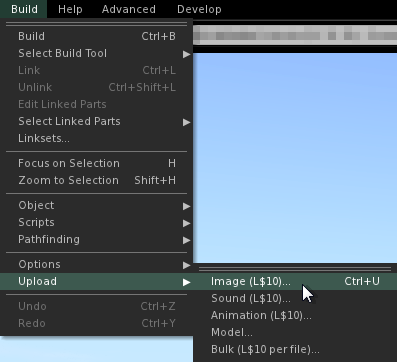
Specify “Preview image as” as Sculpted Prim. And check it by the preview. Check Use lossless compression. And click Upload Button. 
Build a prim and click the Object tab and set Building Block Type to Sculpted. 
Apply your uploaded sculpt map. 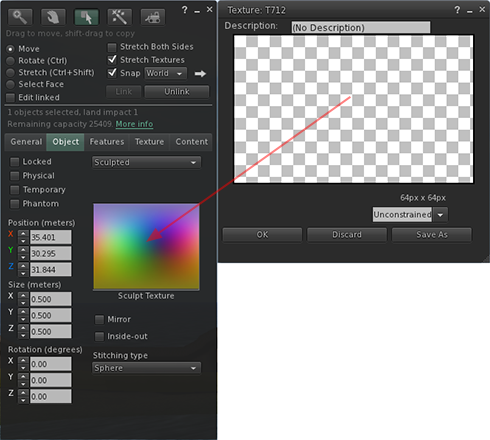
Set Stitching type as Cylinder. 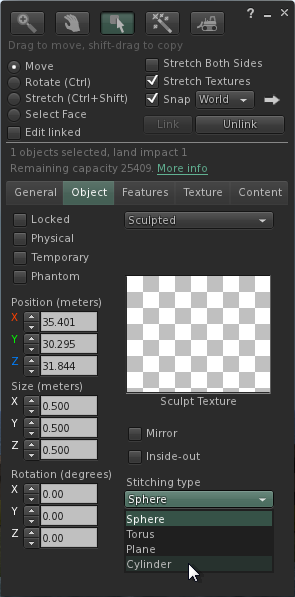
Stretch your object suitably. 
Please set the texture of it to white.
The Roof of the Tiki House was completed. 
Original text: http://kanaenet.blogspot.com/2013/08/t712-1.html
This article is automatically translated by the computer interpreter.
Please notify me of any mistakes in translation.


