Let's make the following bust using the new project of NOMI2.0. 
A project called "Half Sphere" was added to NOMI2.0.
Stitching Type of this project is Sphere. And it has same number as the front side and the back side of control points.
A bust will be made if another height image is applied to the front side and the back side of relief in this project.
The step which makes a bust is as follows.
1) Prepare the height image on on the front side and the back side of a bust.
2) Choose the Half Sphere project of NOMI and build the back side of a bust.
3) Turn the back side and the front side of an object.
4) Make the front side of a bust.
5) Upload to in-world.
Let’s make the height image on on the front side and the back side of a bust.
Read into UTSUSHI of freeware the OBJ file of the bust searched with the Internet, and make a height image. You can download UTSUSHI from the following.
http://kanae.net/secondlife/utsushi.html
Boot UTSUSHI and read the OBJ file of a bust by Load Object of the File menu. 
Click "4" button of the View group, and drag and adjust the trackbar of the Rotate group so that a bust turns to the front.
And drag four lines which exist vertically and horizontally, and specify the range with the bust.

Save an image by Save Image on the File menu. 
Please choose Single Image (PNG) of the kind of file. 
Click "5" buttons of a View group, and you can see the back of the bust. 
You get the following two images.


Please use these images, if you cannot get the OBJ file of a suitable bust.
Boot NOMI and choose “New Project”-“Half Sphere”-“32x32” on the File menu. 
Then, it is displayed as follows. A height image is applied to the yellow area of a preview.

Make the back side in front of the front side. Choose Load Base Picture on the File menu. 
Specify the following image. 
Then, a preview is displayed as follows. 
An edit pane is displayed as follows. 
Move the control points at the very end of on either side to the boundary line of the bust to fit in the range of a bust. 
It is better that control points are arranged inside as follows. 
Choose all the control points. 
The selected control points are displayed as the red point on a preview.
Choose Equal Columns of the pop up menu which an edit display right-clicks and is displayed. 
A control points are arranged at equal intervals as follows at the range of the bust. Adjust the trackbar of an edit pane so that thickness becomes the maximum. 
Choose Rotate Object on the Edit menu and turn the front side and the back side of relief. 
Choose Load Height Data on the View menu. 
Choose the following images. 
Then, the height image on the front side is displayed on an edit display as follows. 
Because a right end and a left end are shared by the front side and the back side, you see the outline portion of a bust already arranged.
Choose all the control points like edit on the back side as follows. 
Choose Equal Columns displayed to right-click an edit pane. 
Then, along with the bust, control points are arranged at equal intervals.
The preview is displayed as follows. 
If the control point of a knot jumps out, please adjust the position of the control point.
Adjust Ovarl ThickNess and Relief Height which are in the lower part of an edit pane so that the front side and the back side may be connected finely. 
In the dialog displayed by Setup on the File menu, set TGA Save Size to 64x64, and check Copy Protection by transparency. 
Choose Save Sculpted Prim of the File menu and save a Sculpt-Map file. 
Because the saved file is not using all the areas of the sculpted prim, you had better do Maximize on the File menu of TATARA. 
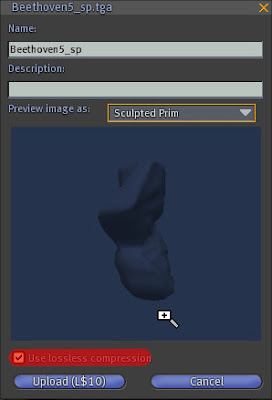
When uploading a file to a second life, Please use Upload Image on File menu. 
And please check Use Lossless compression in the upload dialog box. 
A bust was completed now. 
In addition, if a control points are moved as follows and height is traced, the outline of the face will clarify more.

It is as follows if it is uploaded. 
Please adjust the position of a control point, looking at a preview.
http://rokuro.slmame.com/c53633.html
automatically translated by the computer interpreter.
Please notify me of any mistakes in the translation.


